Settings

Settings

Firebase Integration (For Data Syncing)

TabsyPOS uses Firebase for real-time data syncing between sessions and devices. To enable this feature, you’ll need to configure your own Firebase project and connect it to TabsyPOS.

Follow the steps below to set up Firebase for your store:
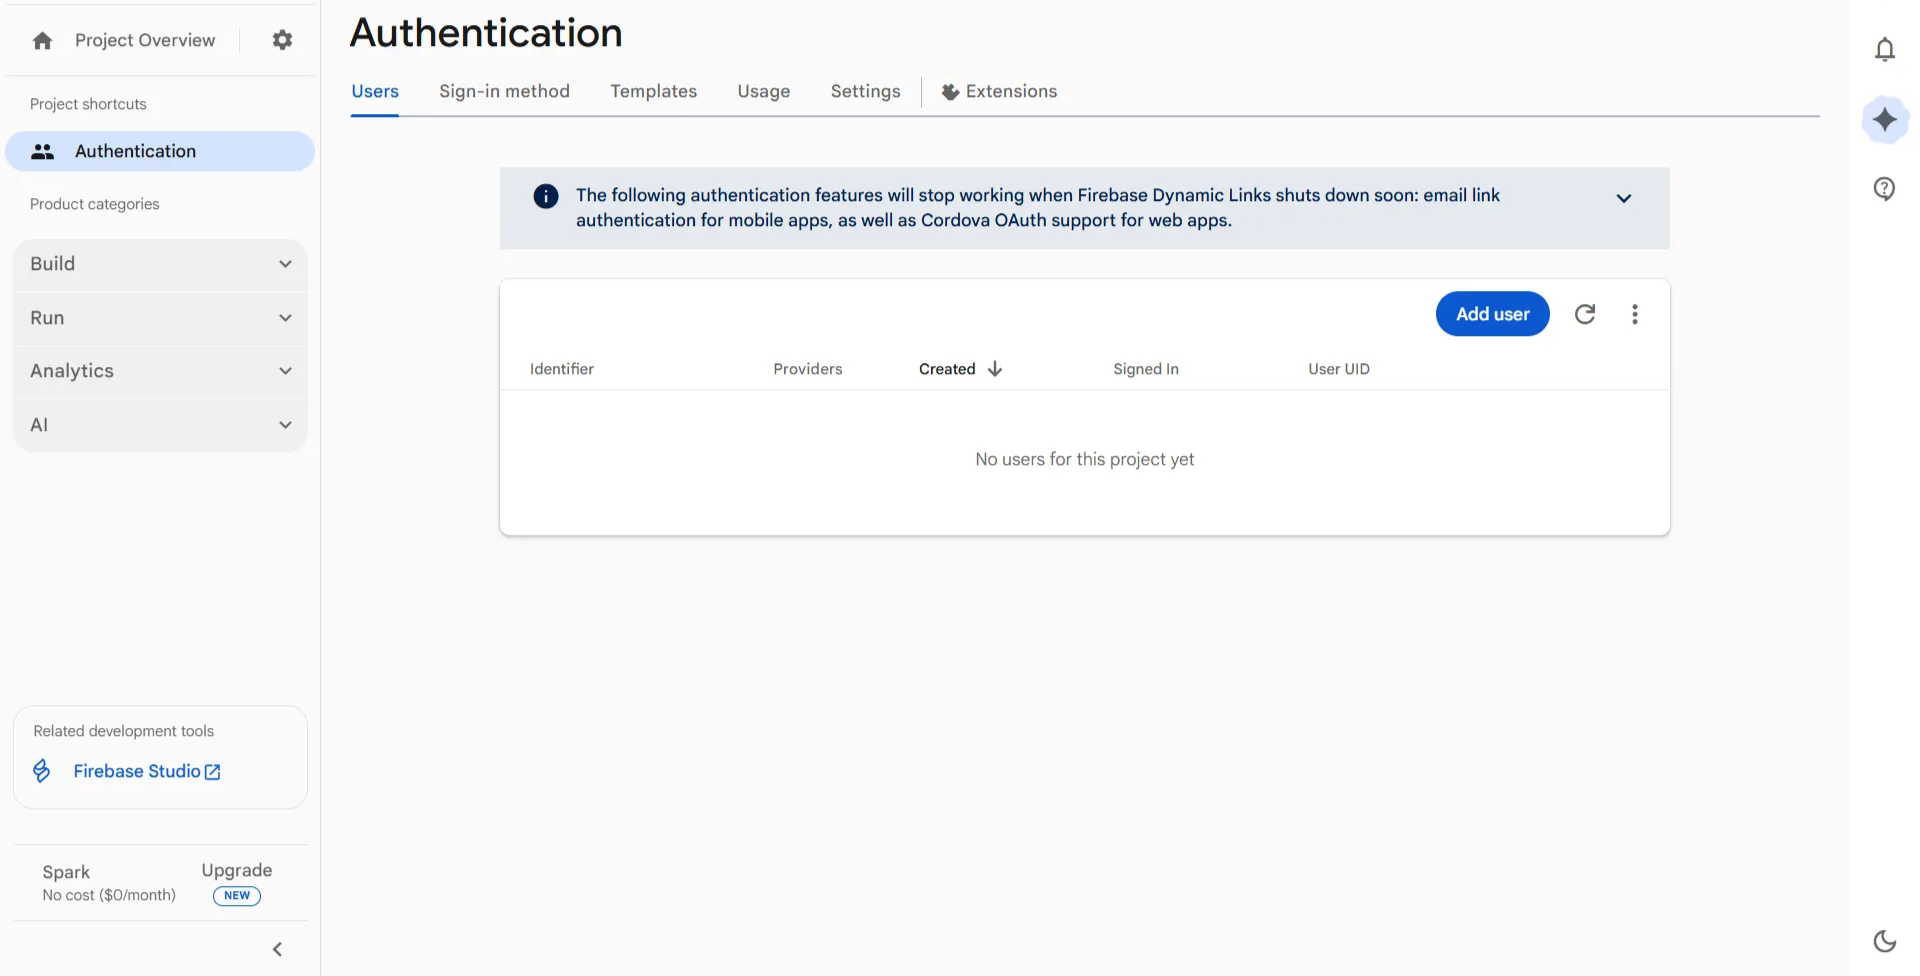
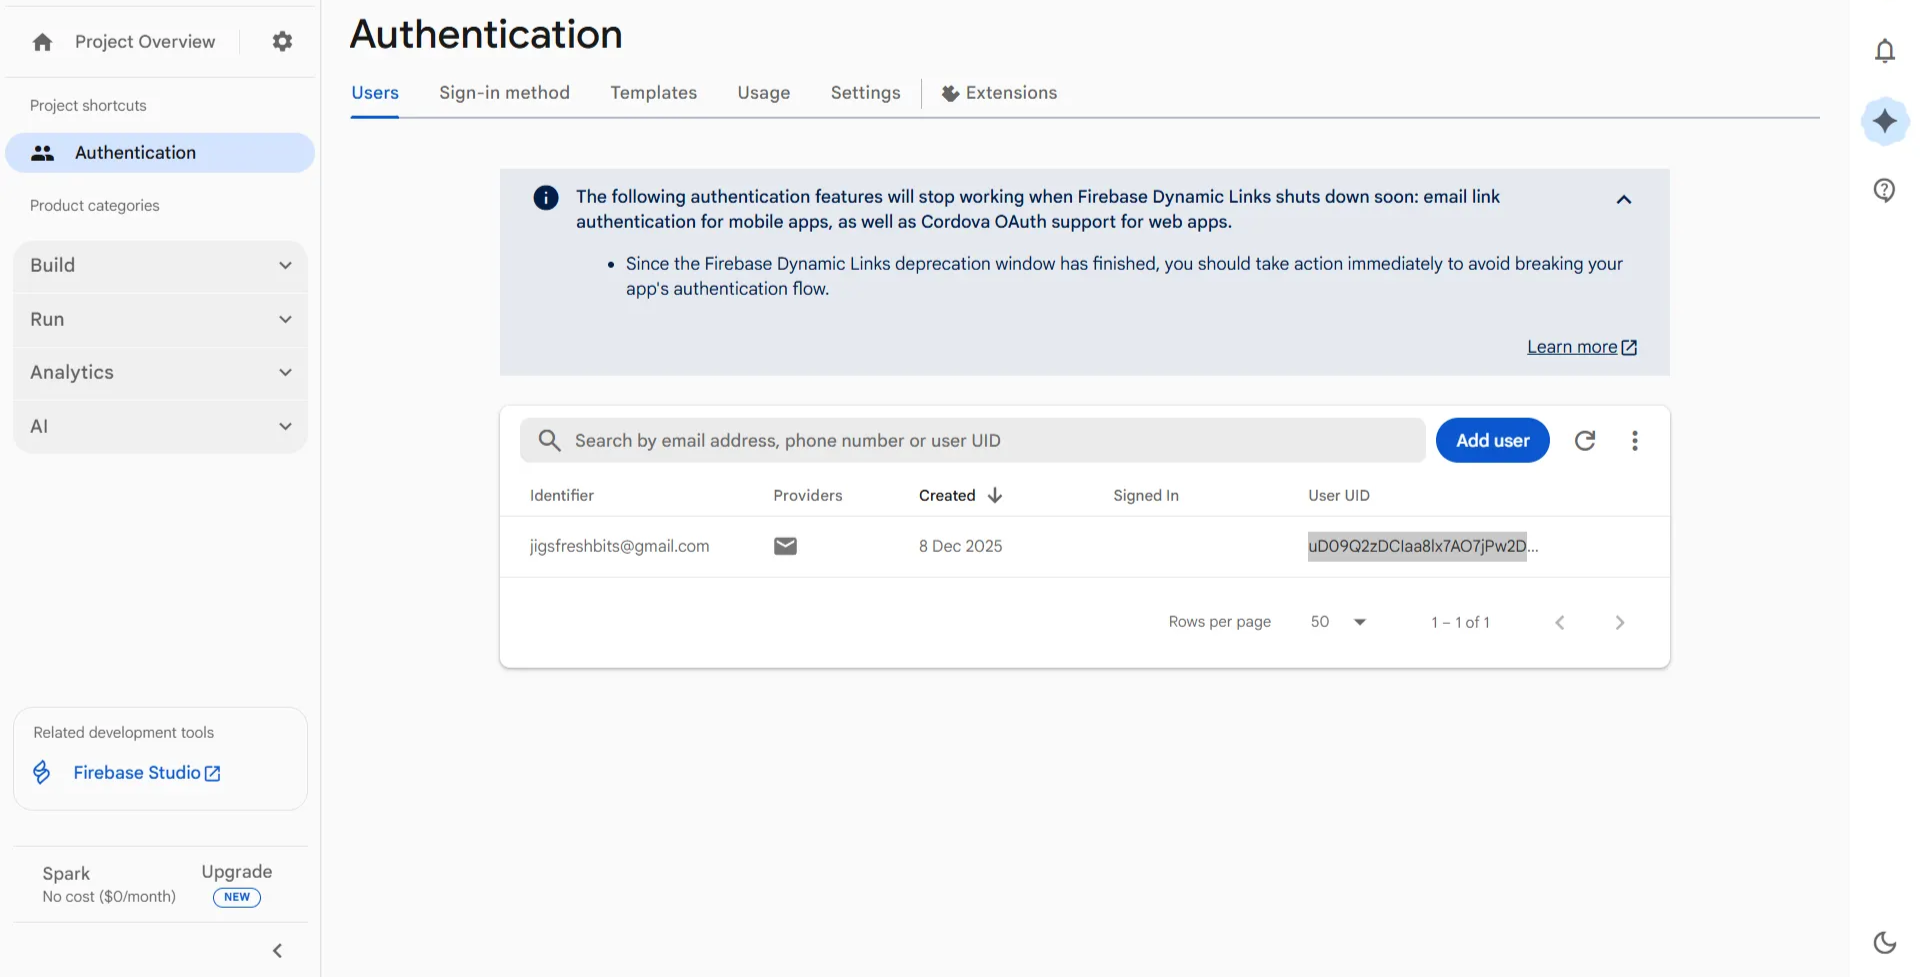
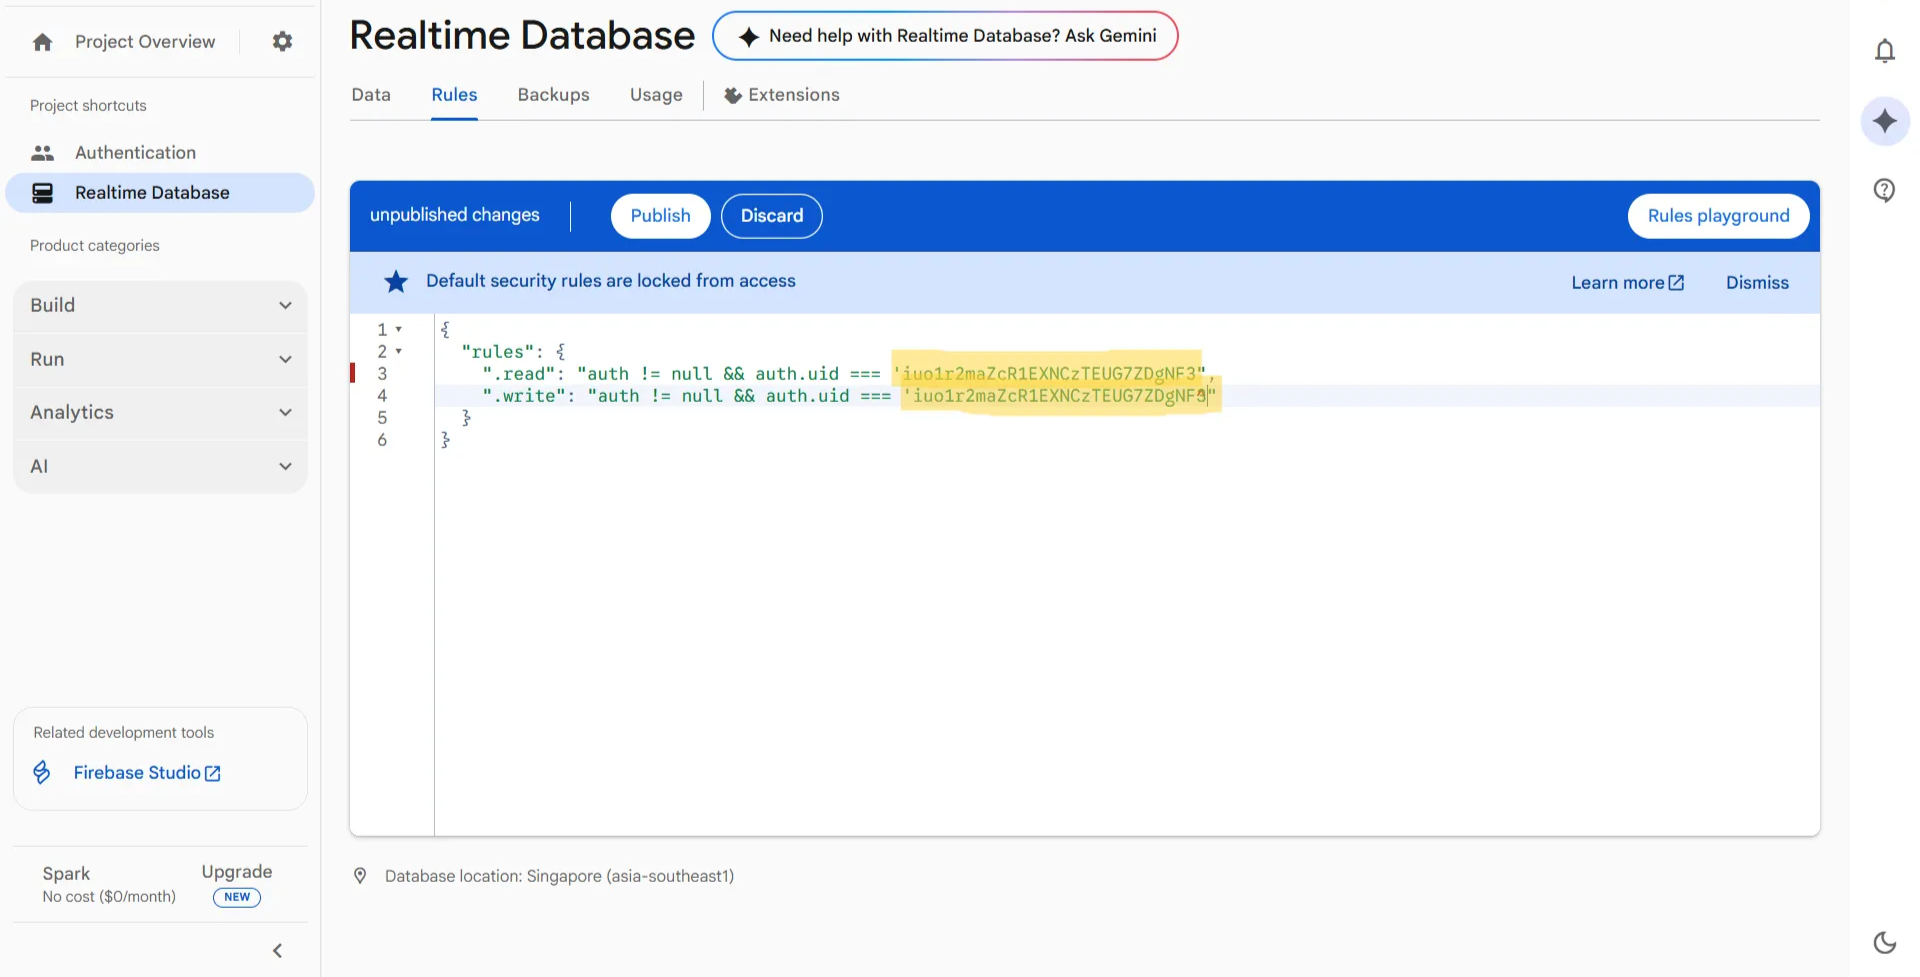
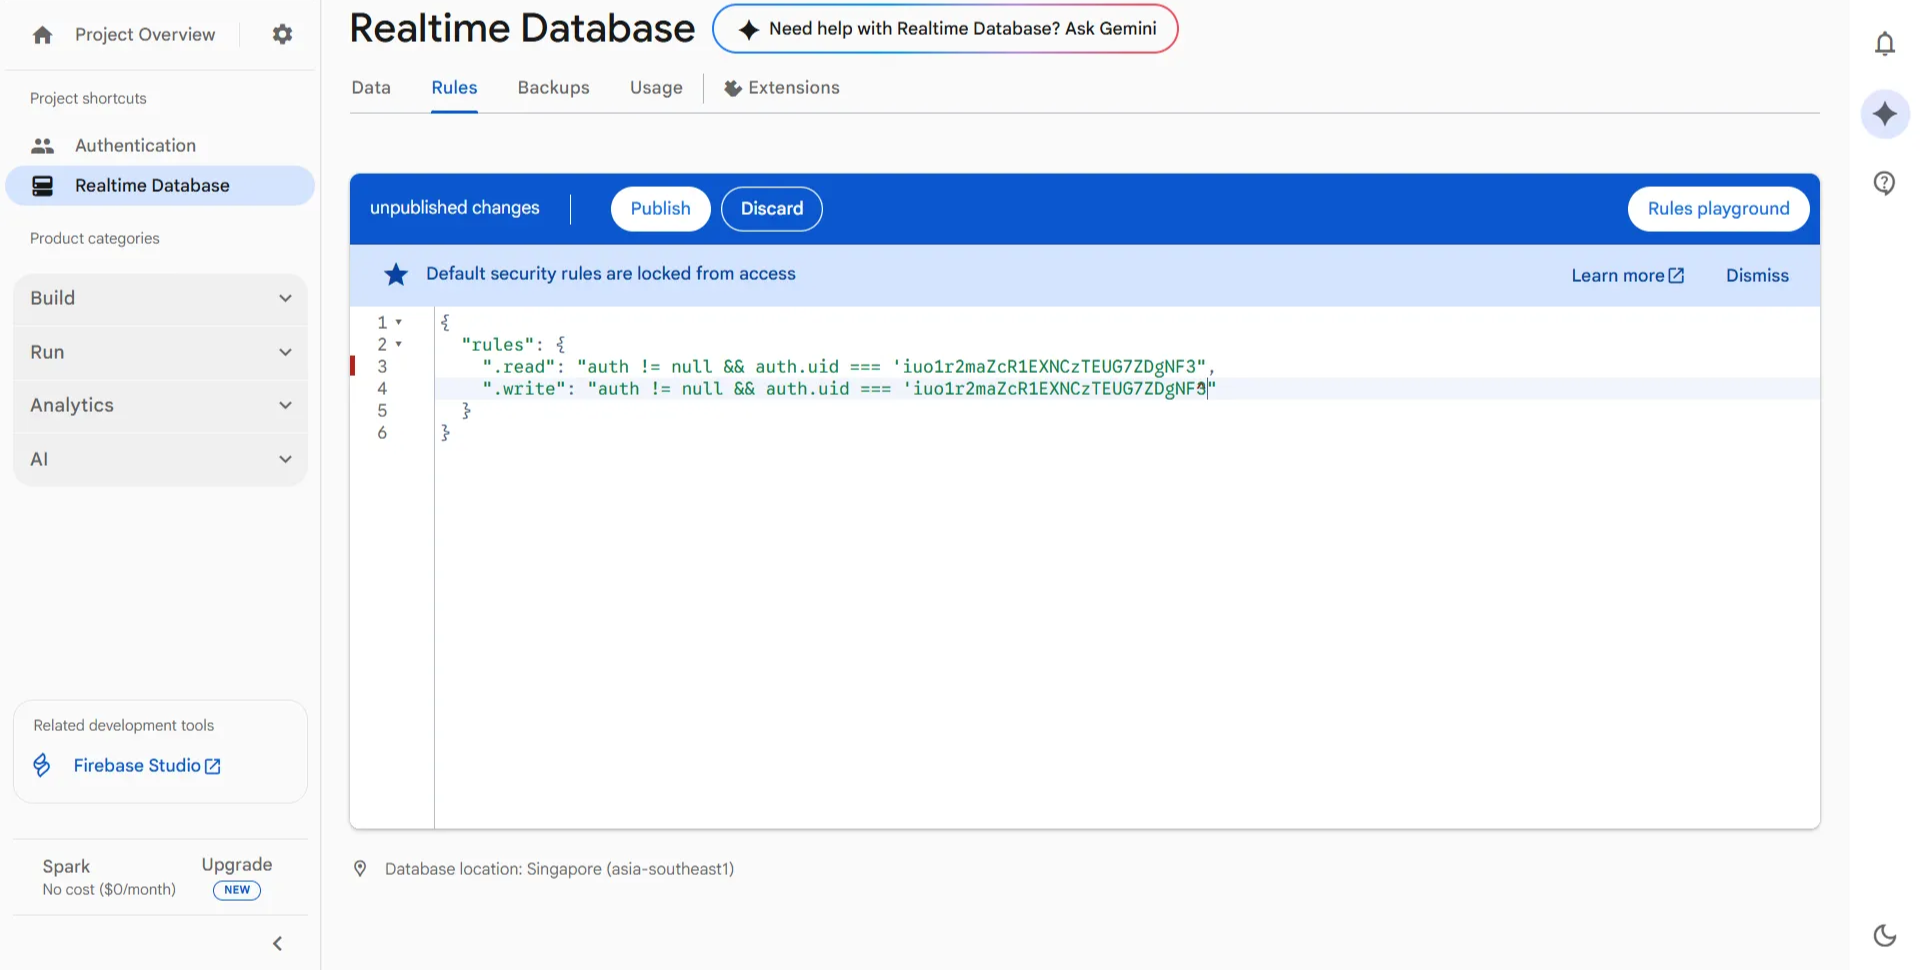

Step 1: Create a Firebase Project

d3420c87-8e2c-4995-b6e5-d1b9f23acbaa.png

  • Set the Project Name, e.g., “TabsyPOS”, and click Continue

Create-project--Firebase-console-11-10-2025_10_33_AM.png

  • Disable Gemini in Firebase, as it is not needed for this setup and click Continue

Create-project--Firebase-console-11-10-2025_10_36_AM.png

  • Disable Google Analytics in Firebase, as it is not needed for this setup and click Create Project

    Create-project--Firebase-console-11-10-2025_10_37_AM.png

  • Once your project is created, click Continue to proceed to the Project Overview page.

    Create-project--Firebase-console-11-10-2025_11_09_AM.png


Step 2: Create a User for Authentication (Recommended for Data Privacy)

  • Go to “Build” and Click on Authentication

    85df4d9c-bd7b-4dbc-899e-83f286b29dc3.png

  • Click Get Started to begin setting up authentication for secure access.

d7aacc1a-970b-43f3-aafd-216bb38375f9.png

  • On the Authentication page, navigate to the Sign-In Method tab. Under Native Providers, select Email/Password.

    54265318-d548-4e77-a789-d32eba9e89ff.png

  • On the Sign-in Providers screen, enable the Email/Password option and then click Save.

    1cfef242-03a9-4cbf-9054-dcff86a44252.png

  • Next, go to the Users tab and click on Add User.

    4b6fa732-0877-467f-9d20-8ee2672e525a.png

  • Enter your Email and Password, then click Add User.

f10dd369-aa12-4101-a58b-4d0f0ffe85a4.png

  • After the user is created, a User UID will be generated.

    6b03d60b-e681-4a7d-a8e5-d182480c3f5d.png

  • Copy this UID and paste it into the Realtime Database —> Rules section in Firebase as shown below:

de7bd95d-d8e1-4e6f-90b5-3a7c4d6bb5b4.png


Step 3: Create a Realtime Database

  • From the sidebar, navigate to Build → Realtime Database and click on Create Database

38fc47fb-f03b-4ca2-a93b-07c0950308ca.png

  • Select your preferred database location and click Next

    d9efb9a9-e6c9-4b69-9403-57065ee15710.png

  • Keep Start in Locked Mode selected (default) and click Enable

    af1c1b5b-ed9d-491d-ab8a-57f5a9181d6d.png


Step 4: Update Database Rules

  • Once the database is created, open the Rules tab.
  • Copy below given rule and paste the same to the Rules tab.
{
  "rules": {
    ".read": "auth != null && auth.uid === 'iuo1r2maZcR1EXNCzTEUG7ZDgNF3'",
    ".write": "auth != null && auth.uid === 'iuo1r2maZcR1EXNCzTEUG7ZDgNF3'"
  }
}

21bb94df-b13b-4e6a-986a-582b56a31430.png

Once added, click on Publish


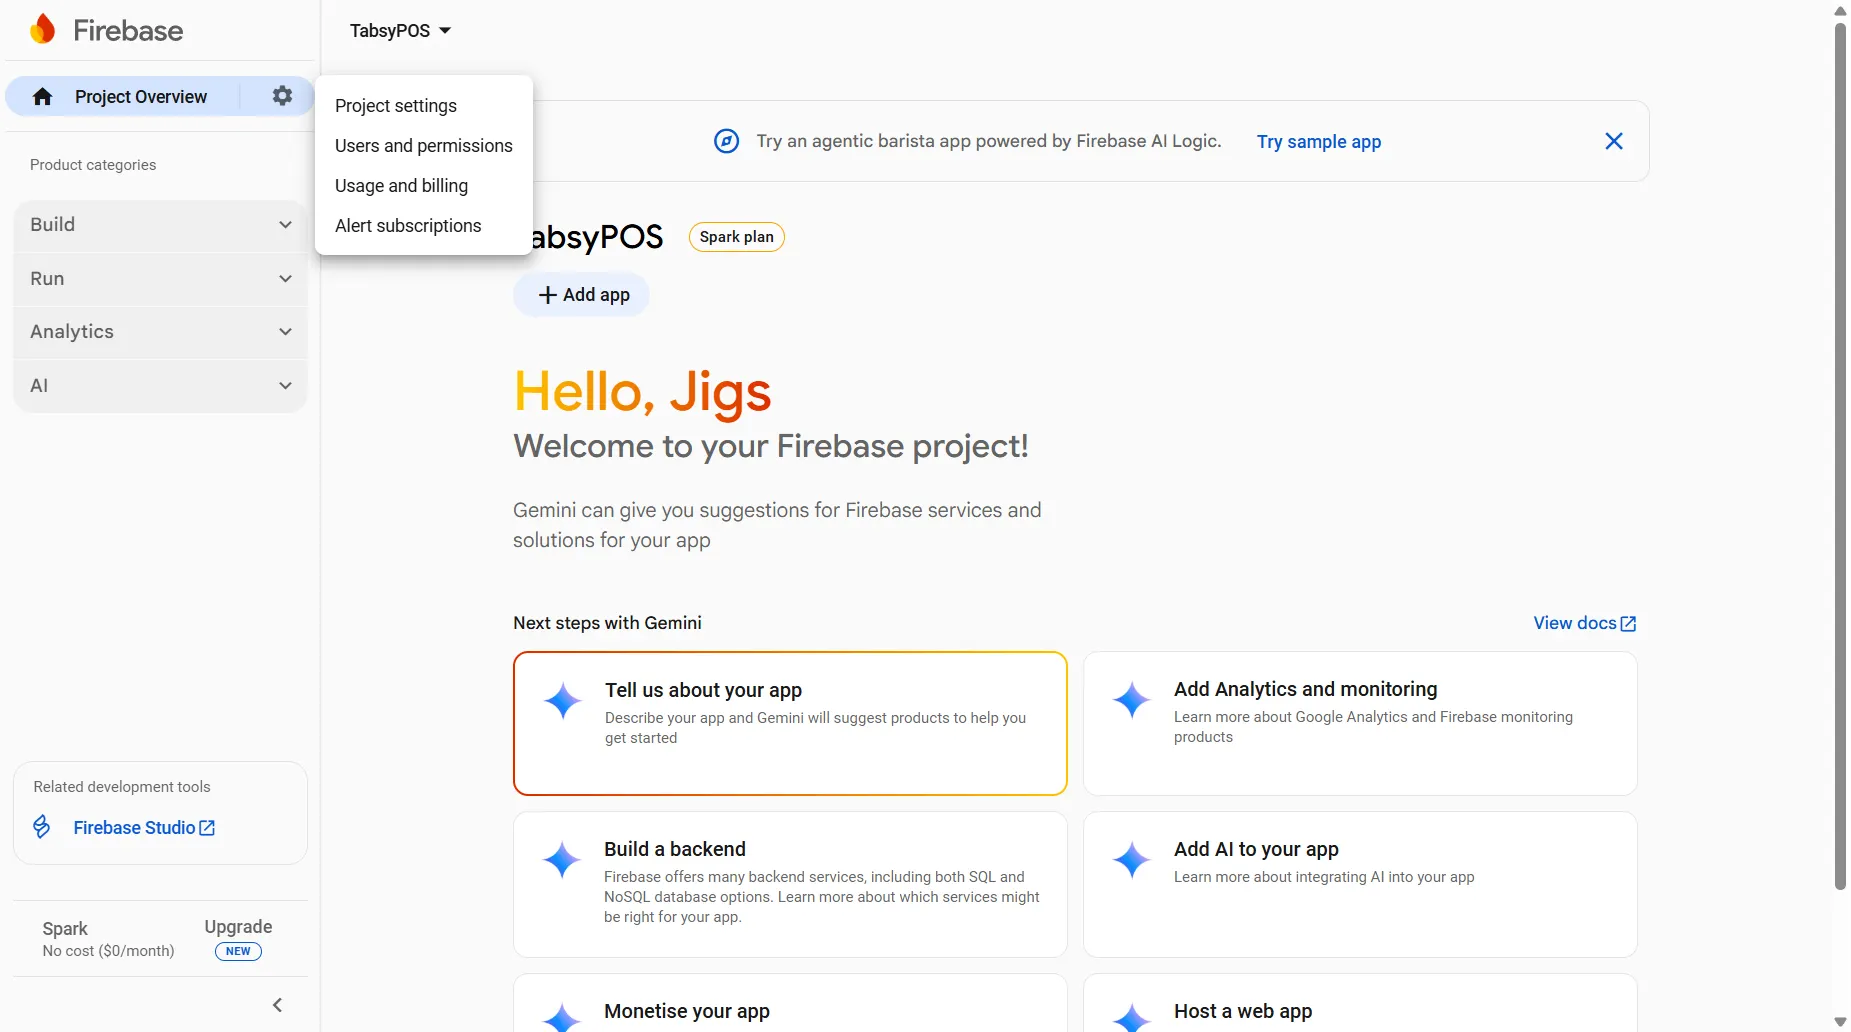
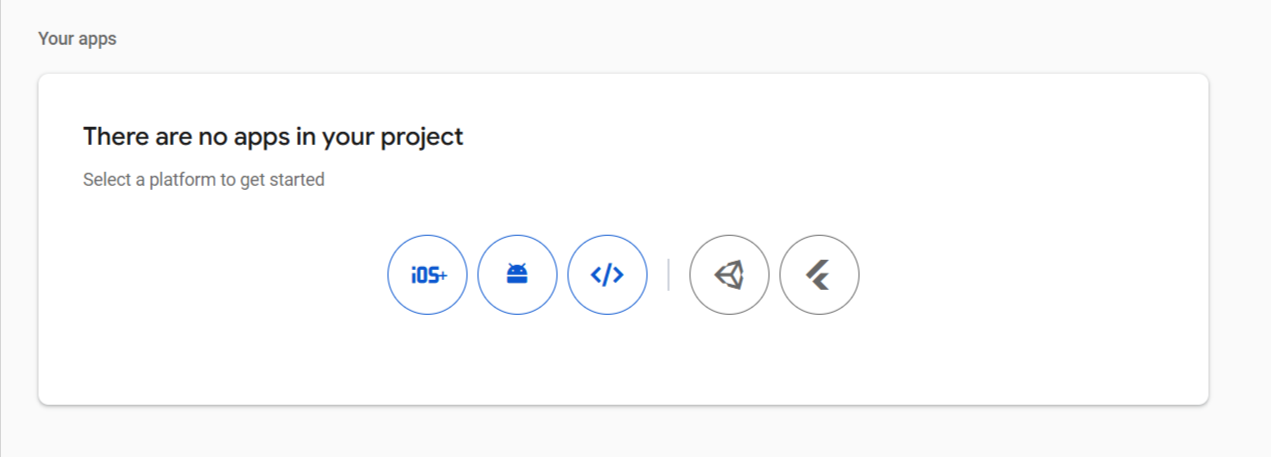
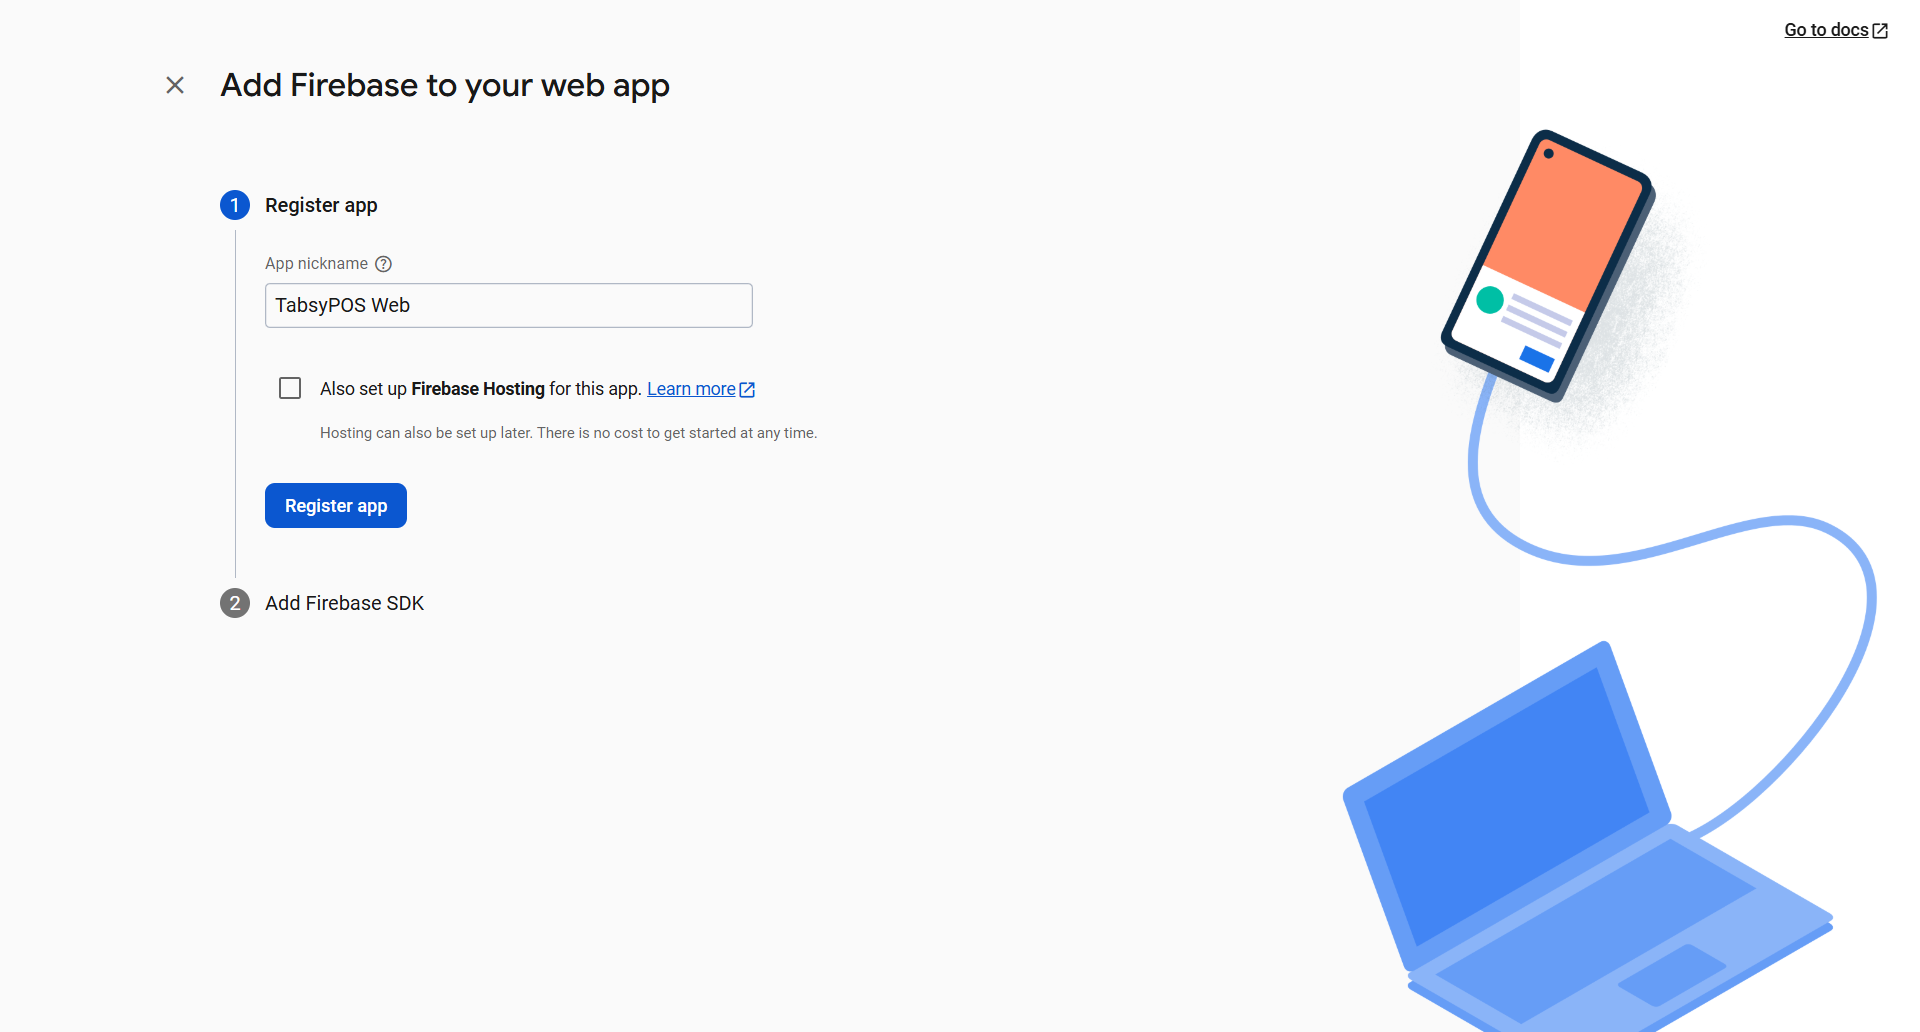
Step 5: Add a Web App

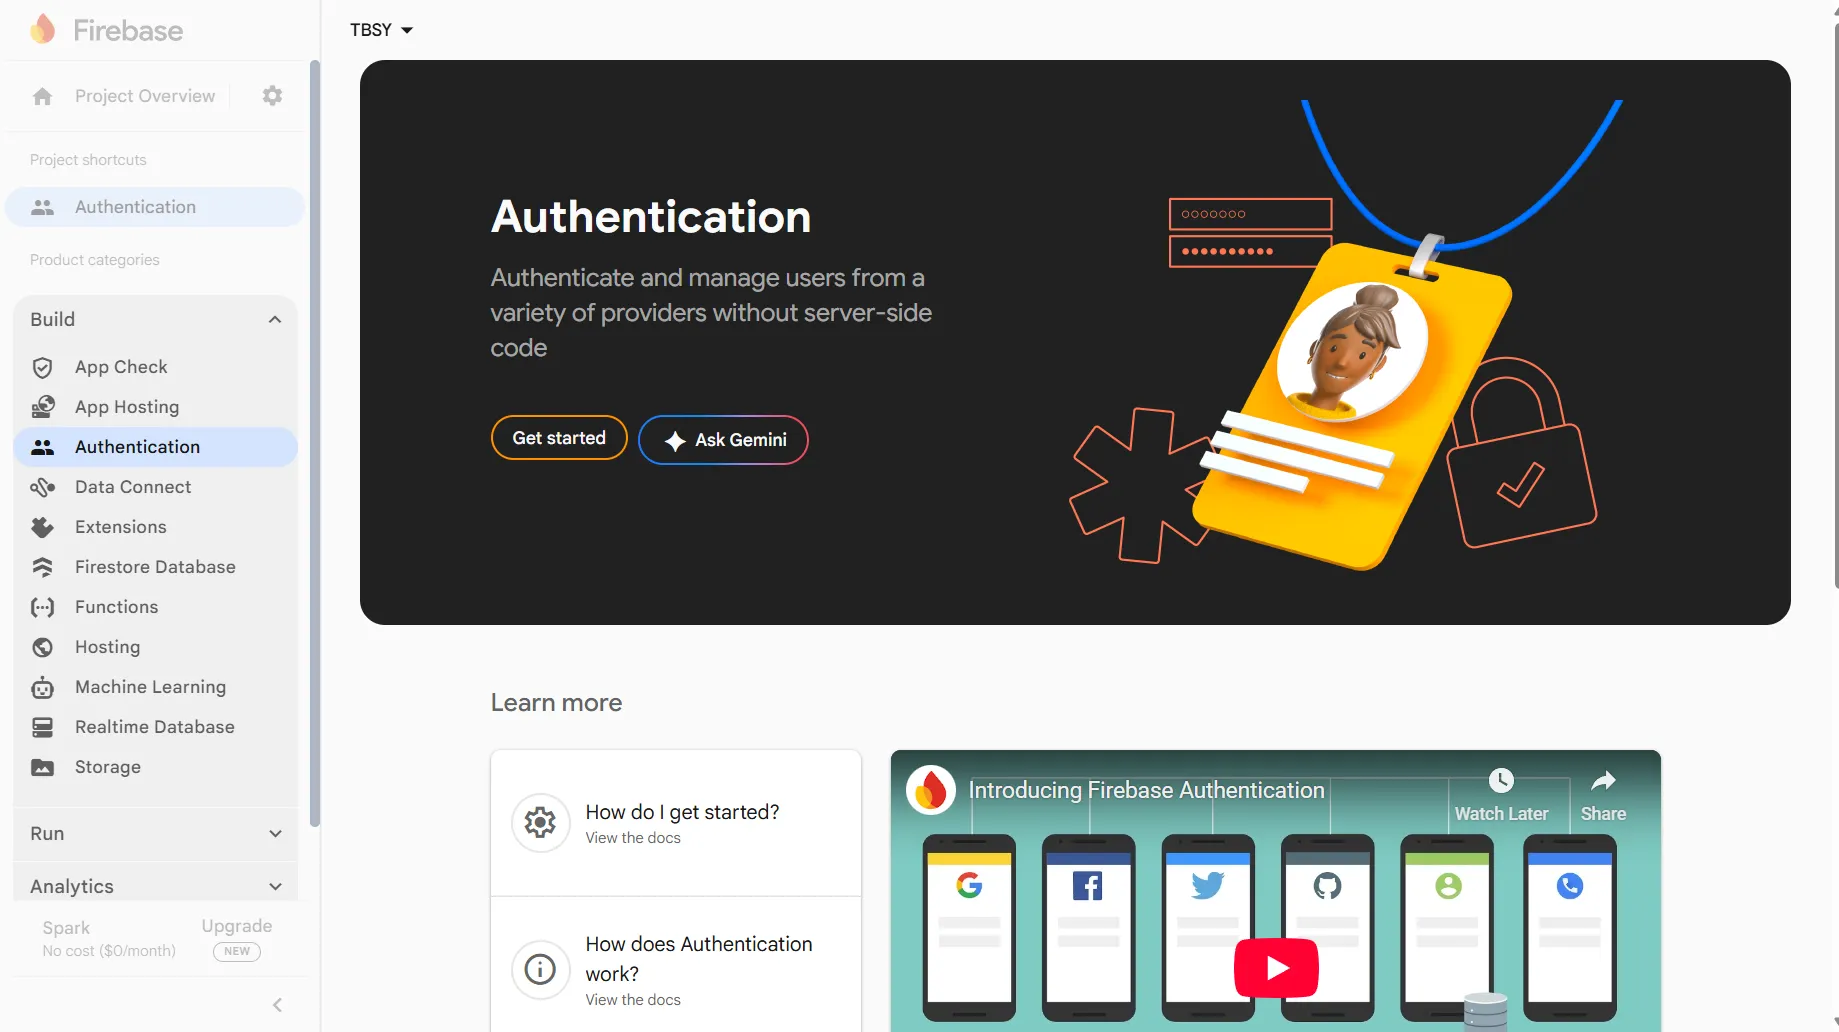
  • From the left sidebar, go to Project Overview → Project Settings

    05e5d4f2-99c1-477b-9bc7-eaed47f7ebe2.png

  • Click on the Web icon (</>) under Your Apps

    TabsyPOS--Project-settings--General--Firebase-console-11-10-2025_11_11_AM.png

  • Add an App Nickname and click Register App

    TabsyPOS--Add-app--General--Firebase-console-11-10-2025_09_53_AM.png

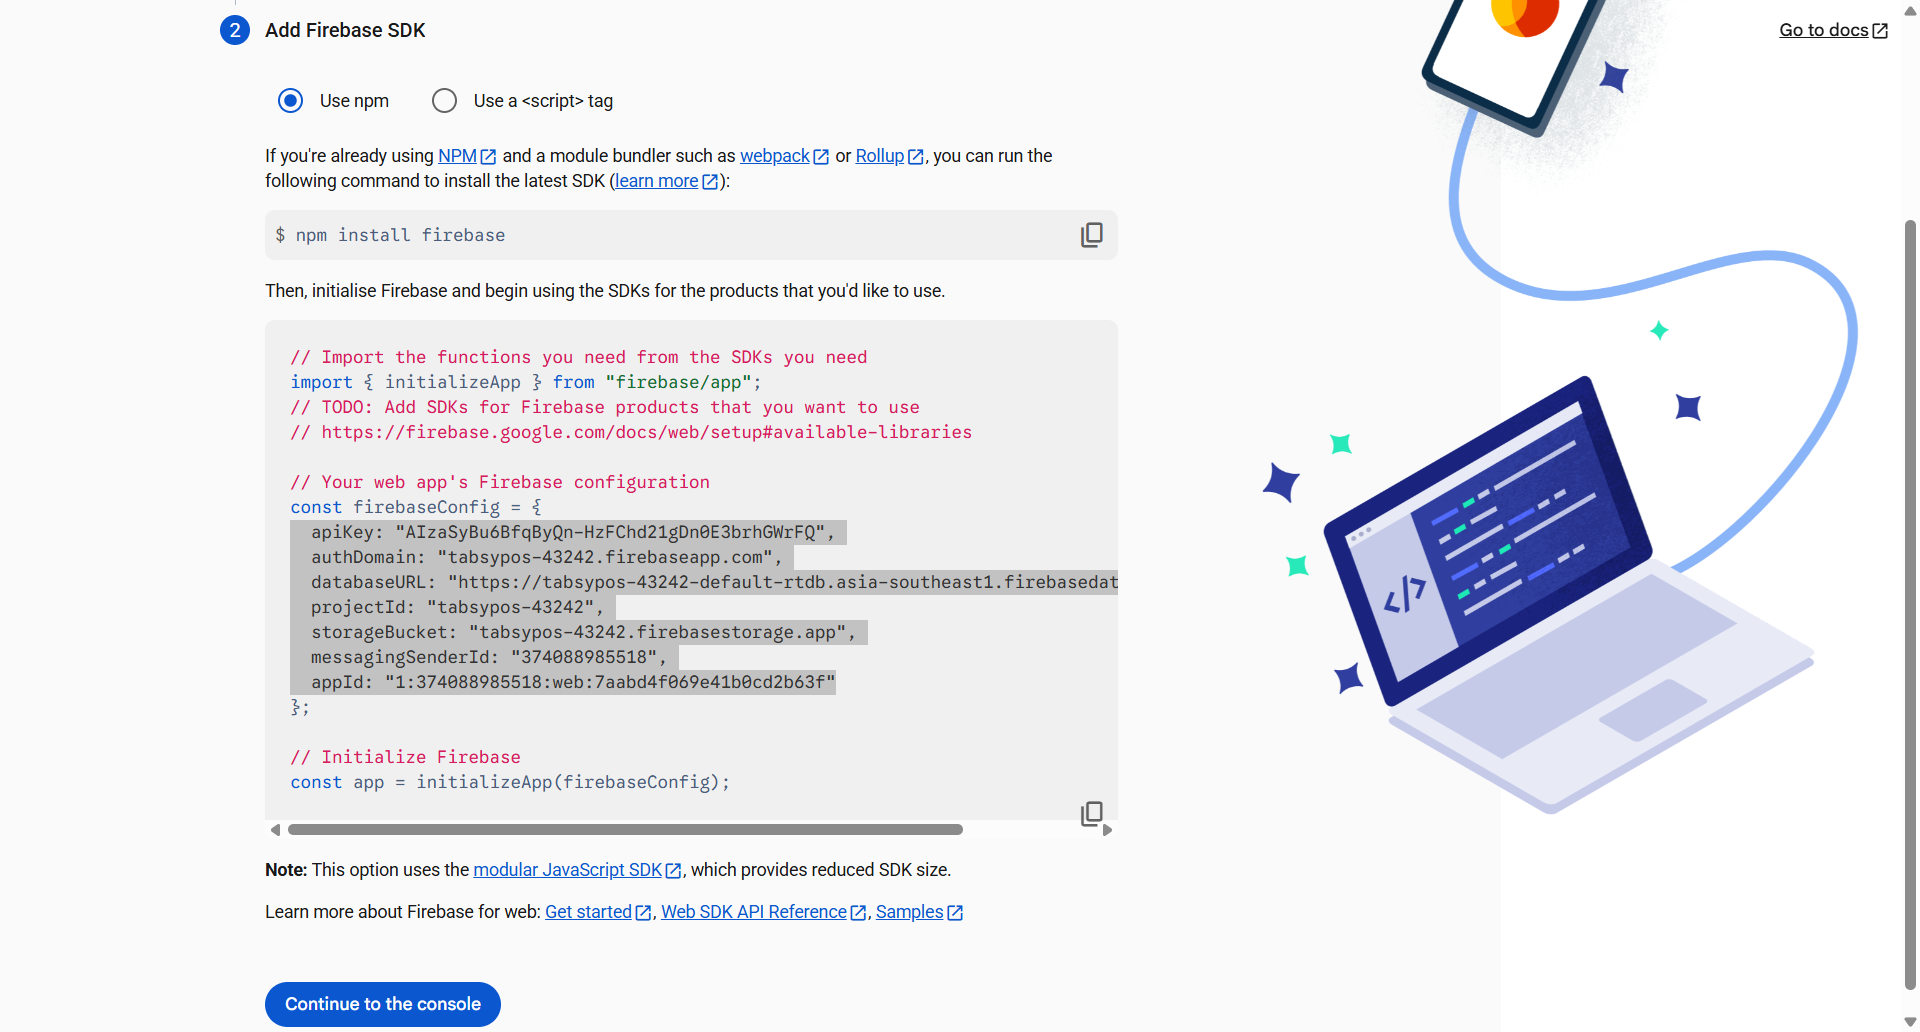
  • Under ‘Add Firebase SDK’, ensure ‘Use npm’ is selected (default).

  • Copy all the provided Firebase Configuration Keys.

    TabsyPOS--Project-settings--General--Firebase-console-11-28-2025_09_10_AM.png

  • Click Continue to Console when done.

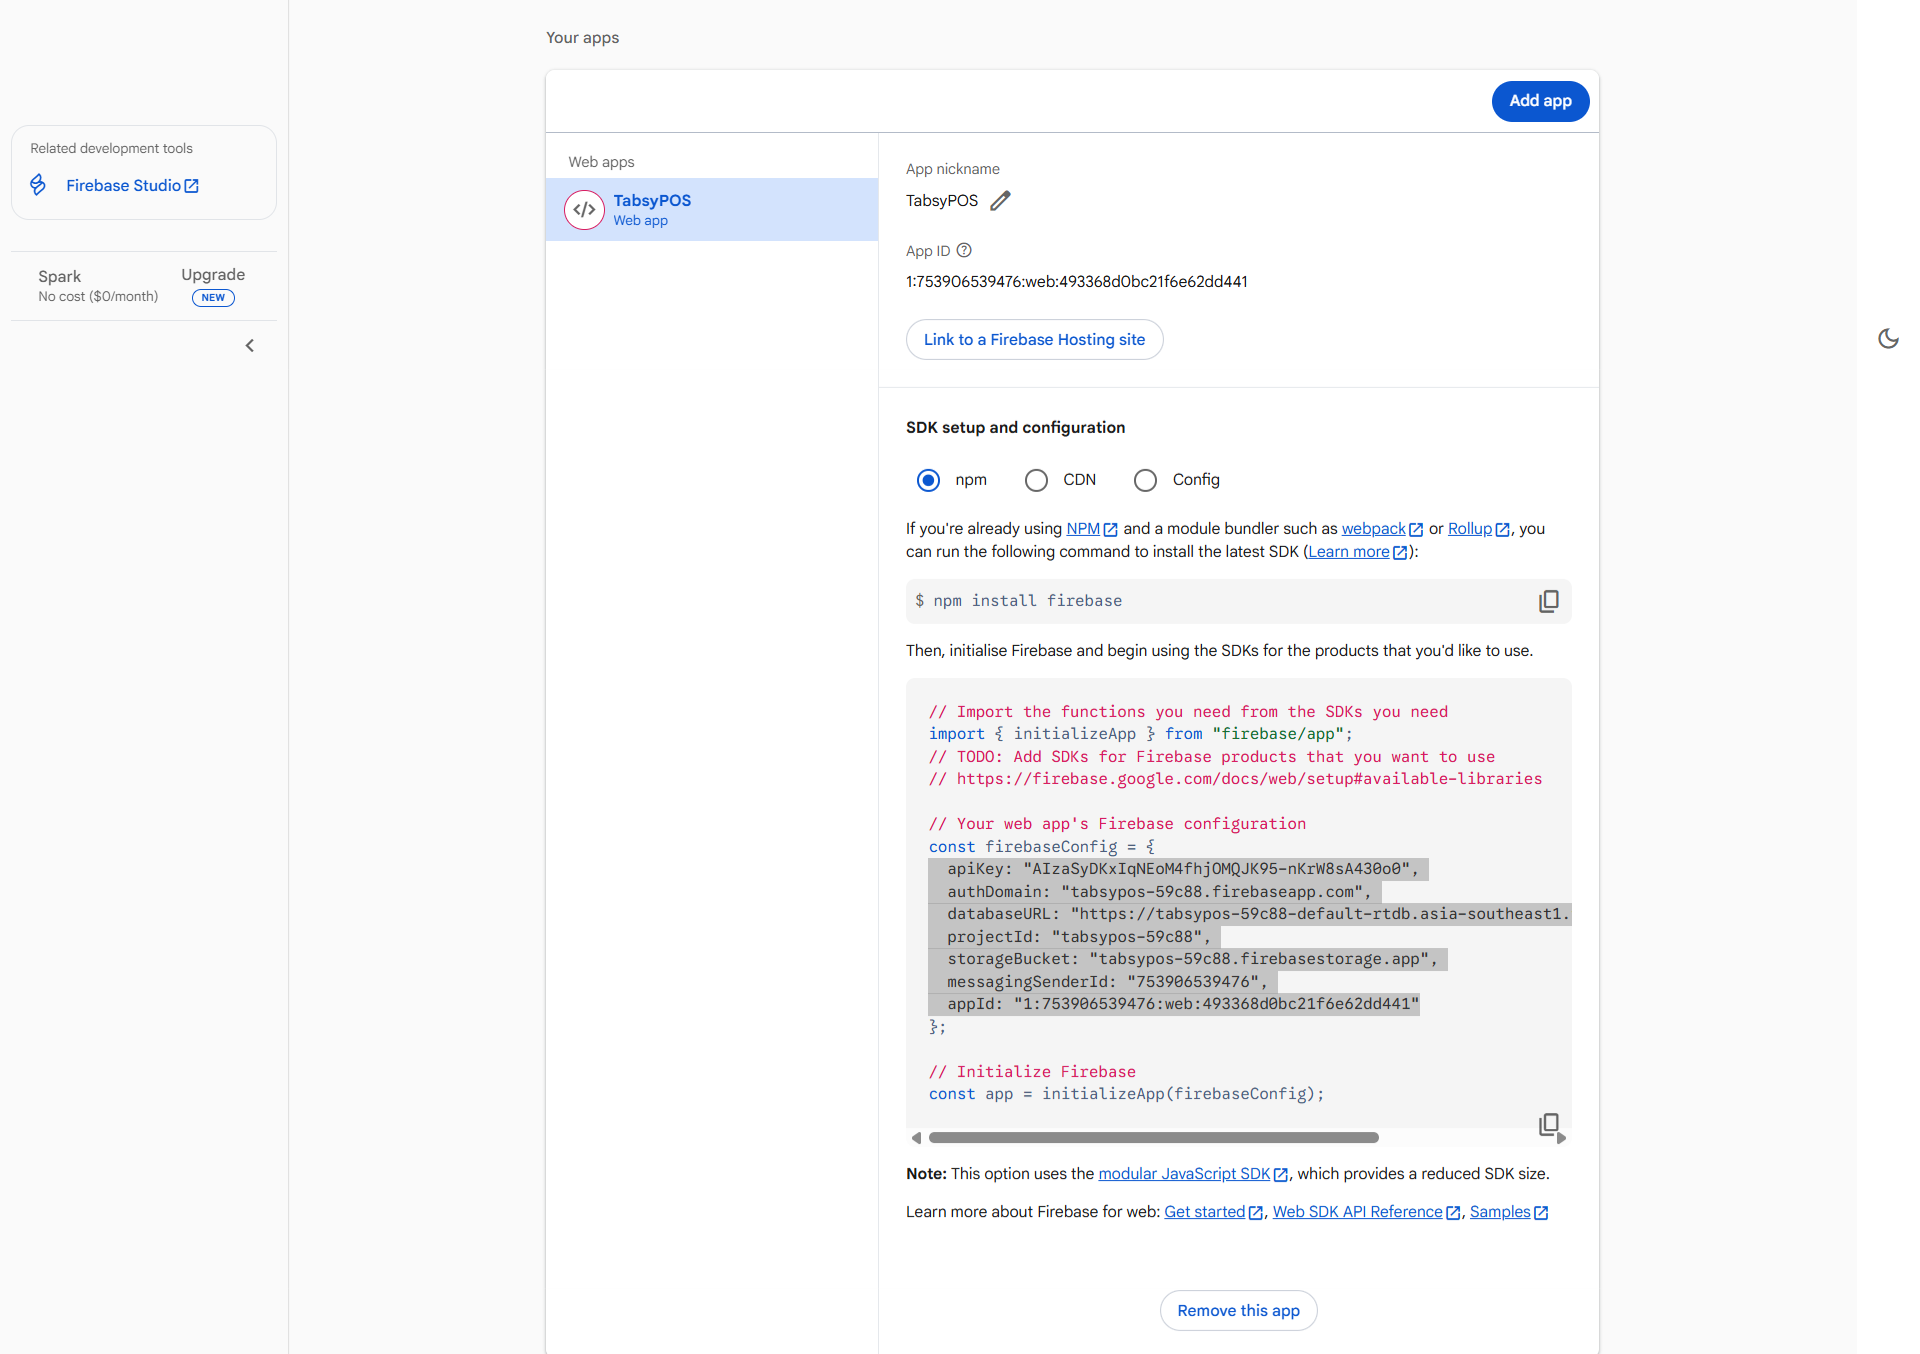
  • To view the API keys again, go to Project Settings → Scroll Down, and you will find them listed under Your Apps.

    TabsyPOS--Project-settings--General--Firebase-console-11-28-2025_09_00_AM.png


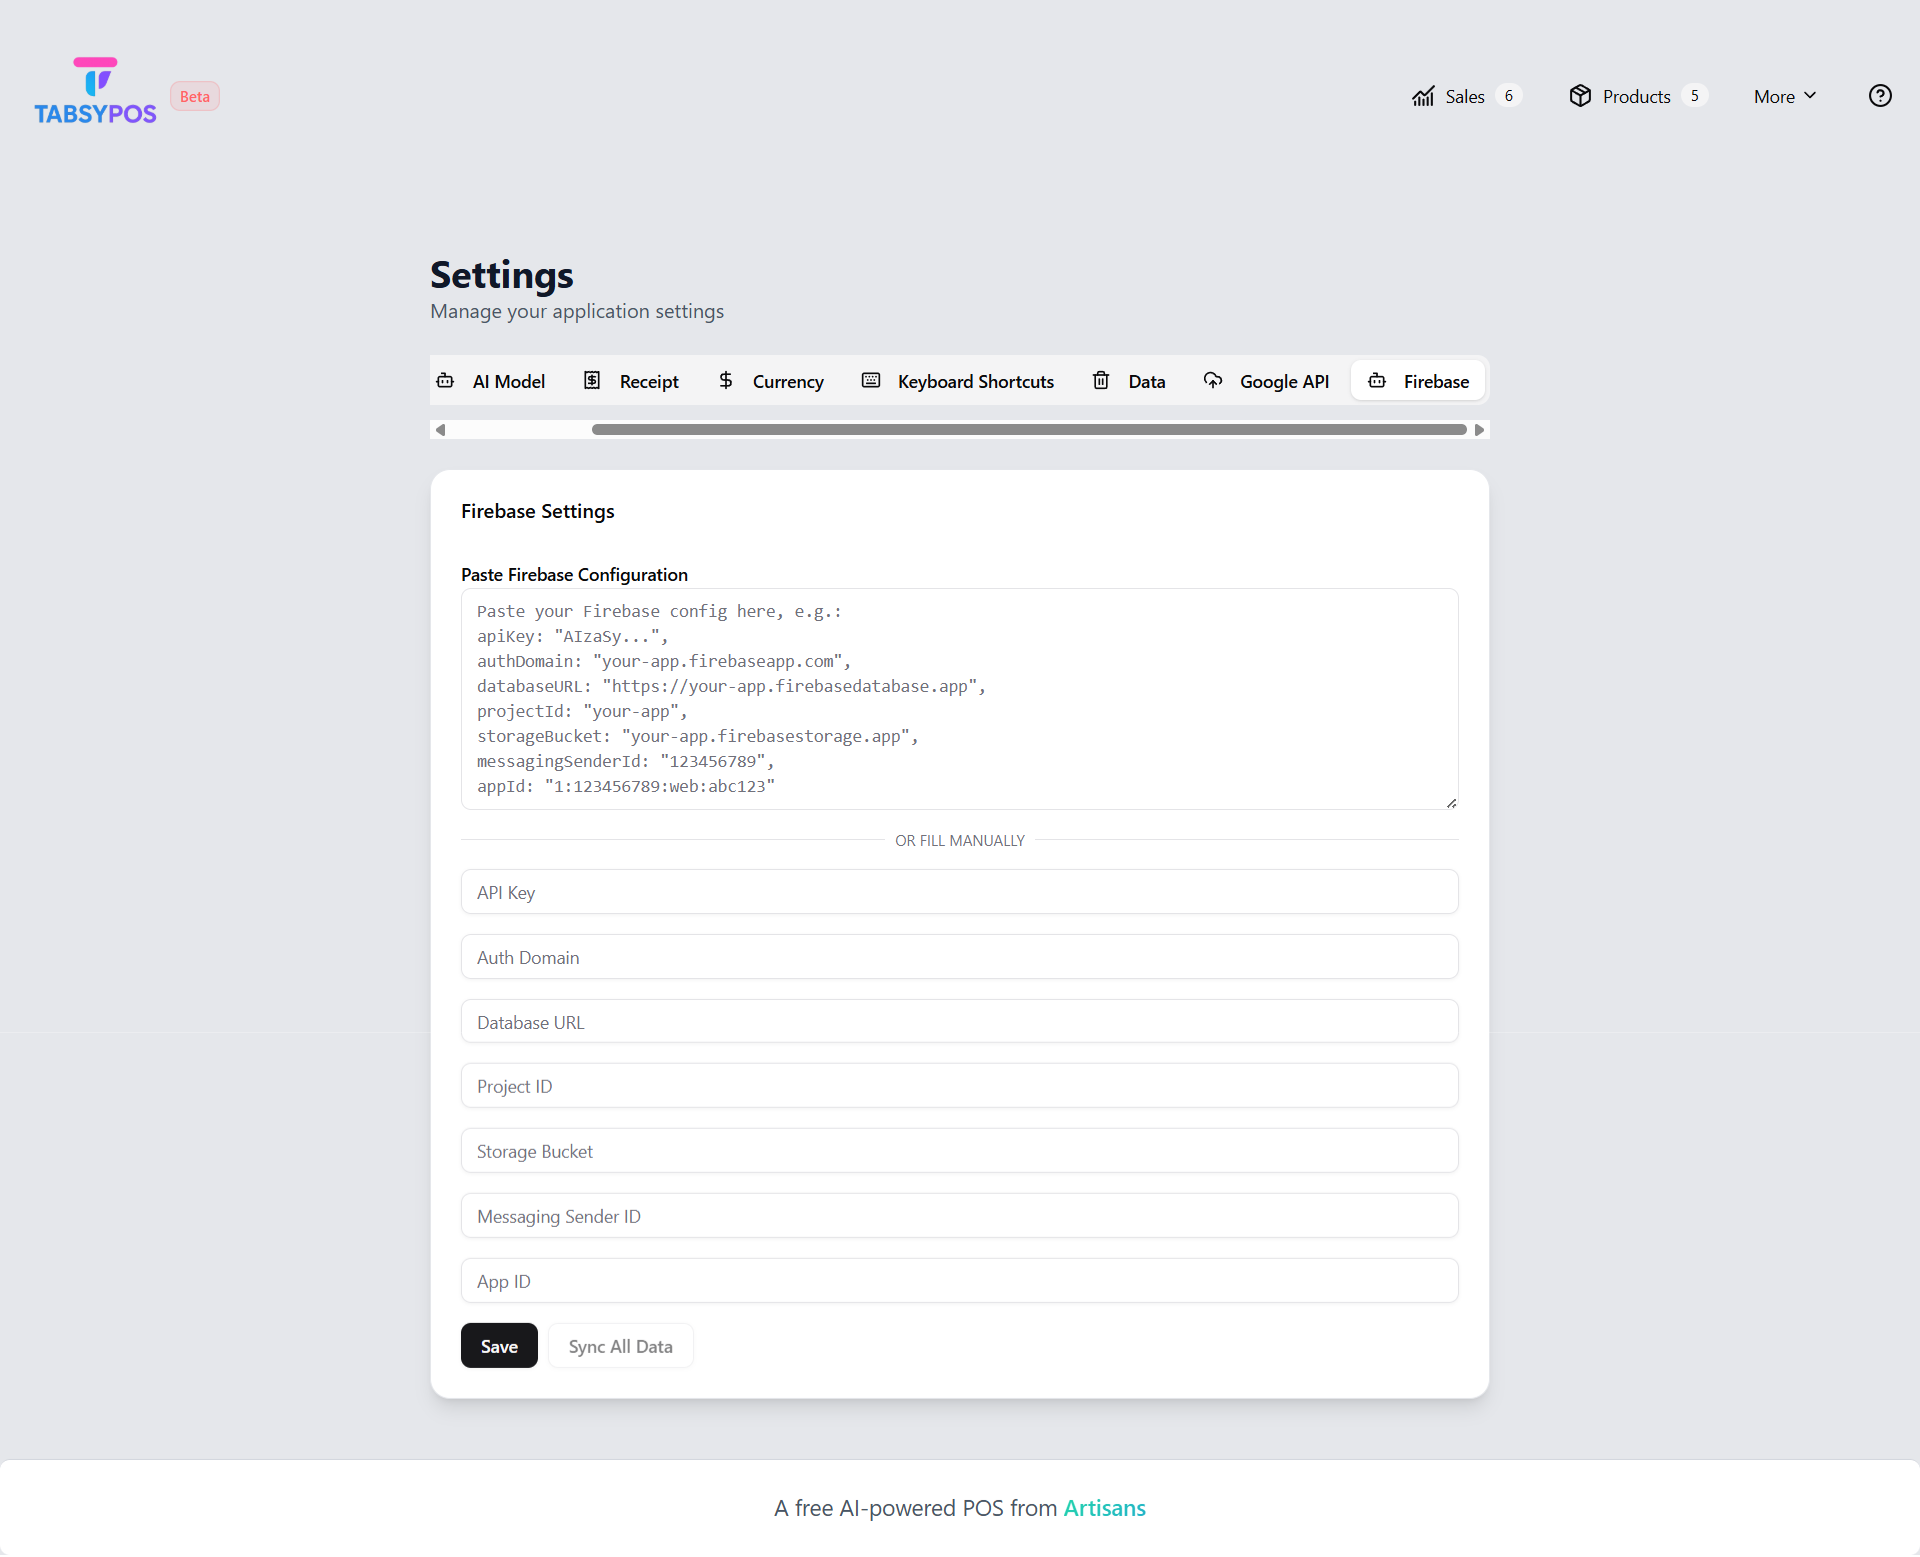
Step 6: Connect Firebase to TabsyPOS

  • Open TabsyPOS → Settings → Firebase Configuration.

  • Paste all copied keys into their respective fields or on the input box

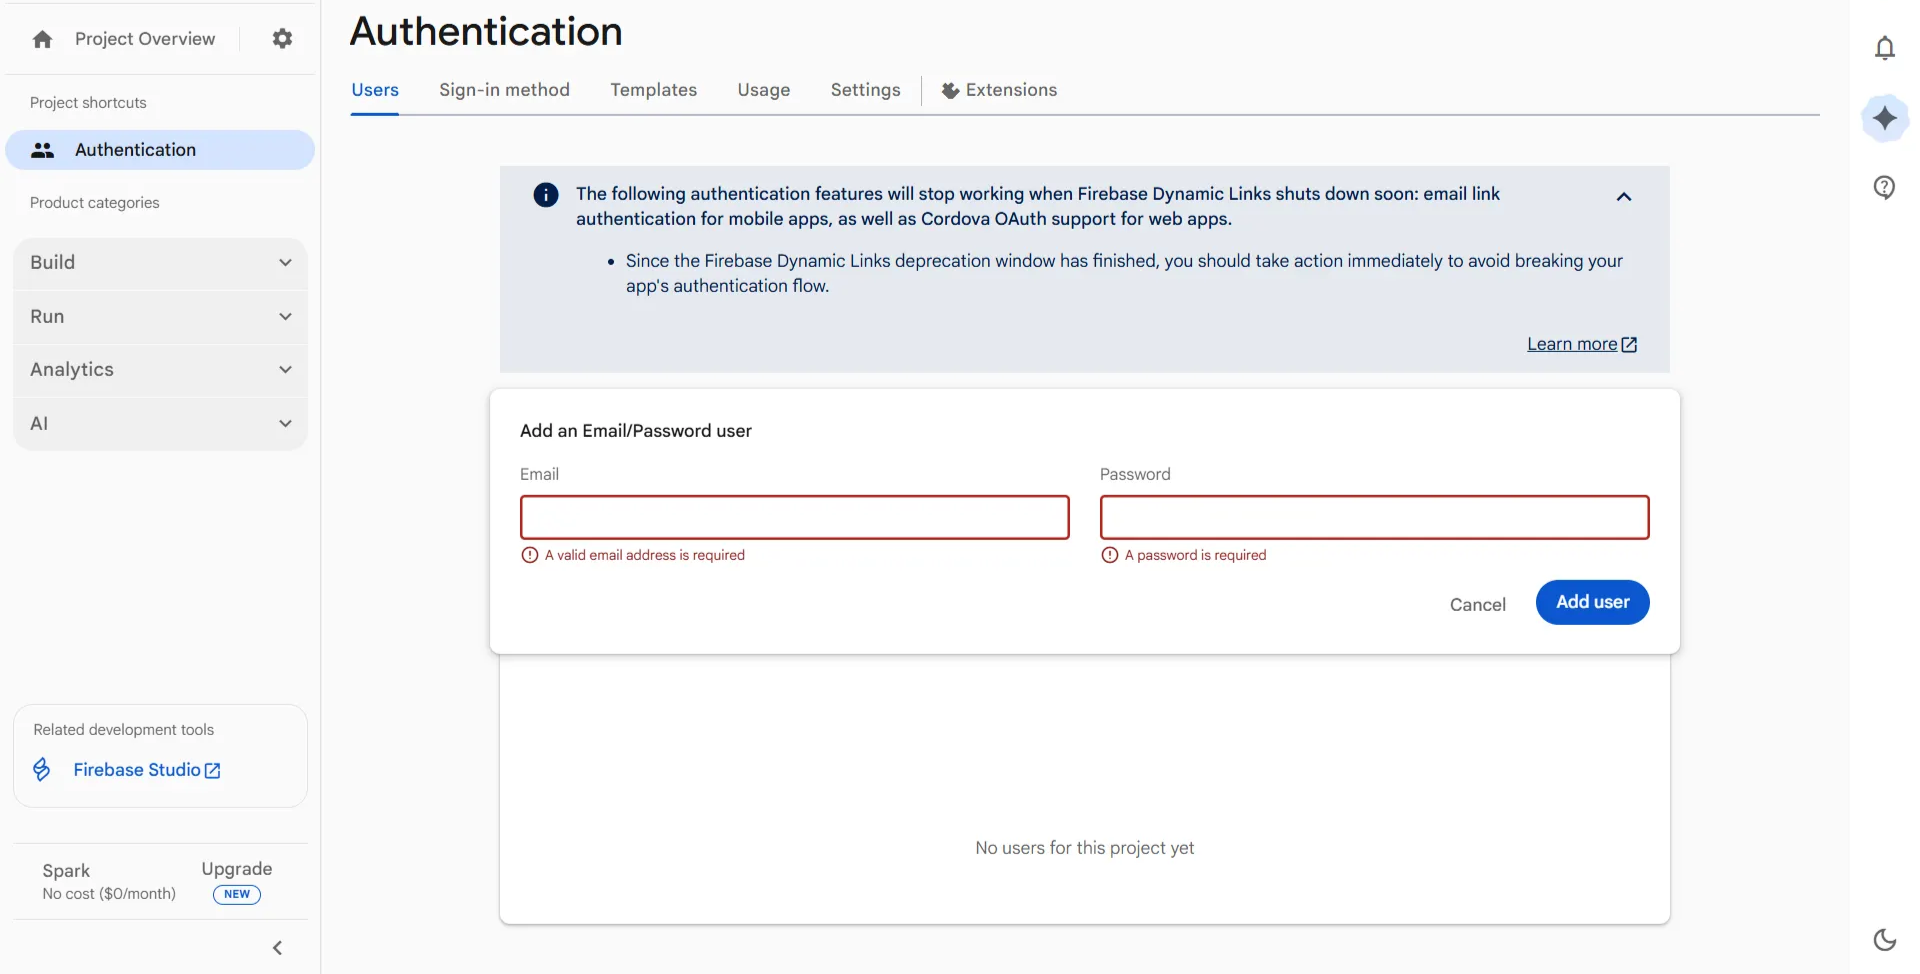
  • Add your Email and Password, which is used to create user in Firebase for Authentication.

  • Save the configuration to complete the setup.

    TabsyPOS-Smart-POS-System-11-28-2025_09_12_AM.png


Step 7: View Synced Data in Firebase

To verify that your data is syncing correctly:

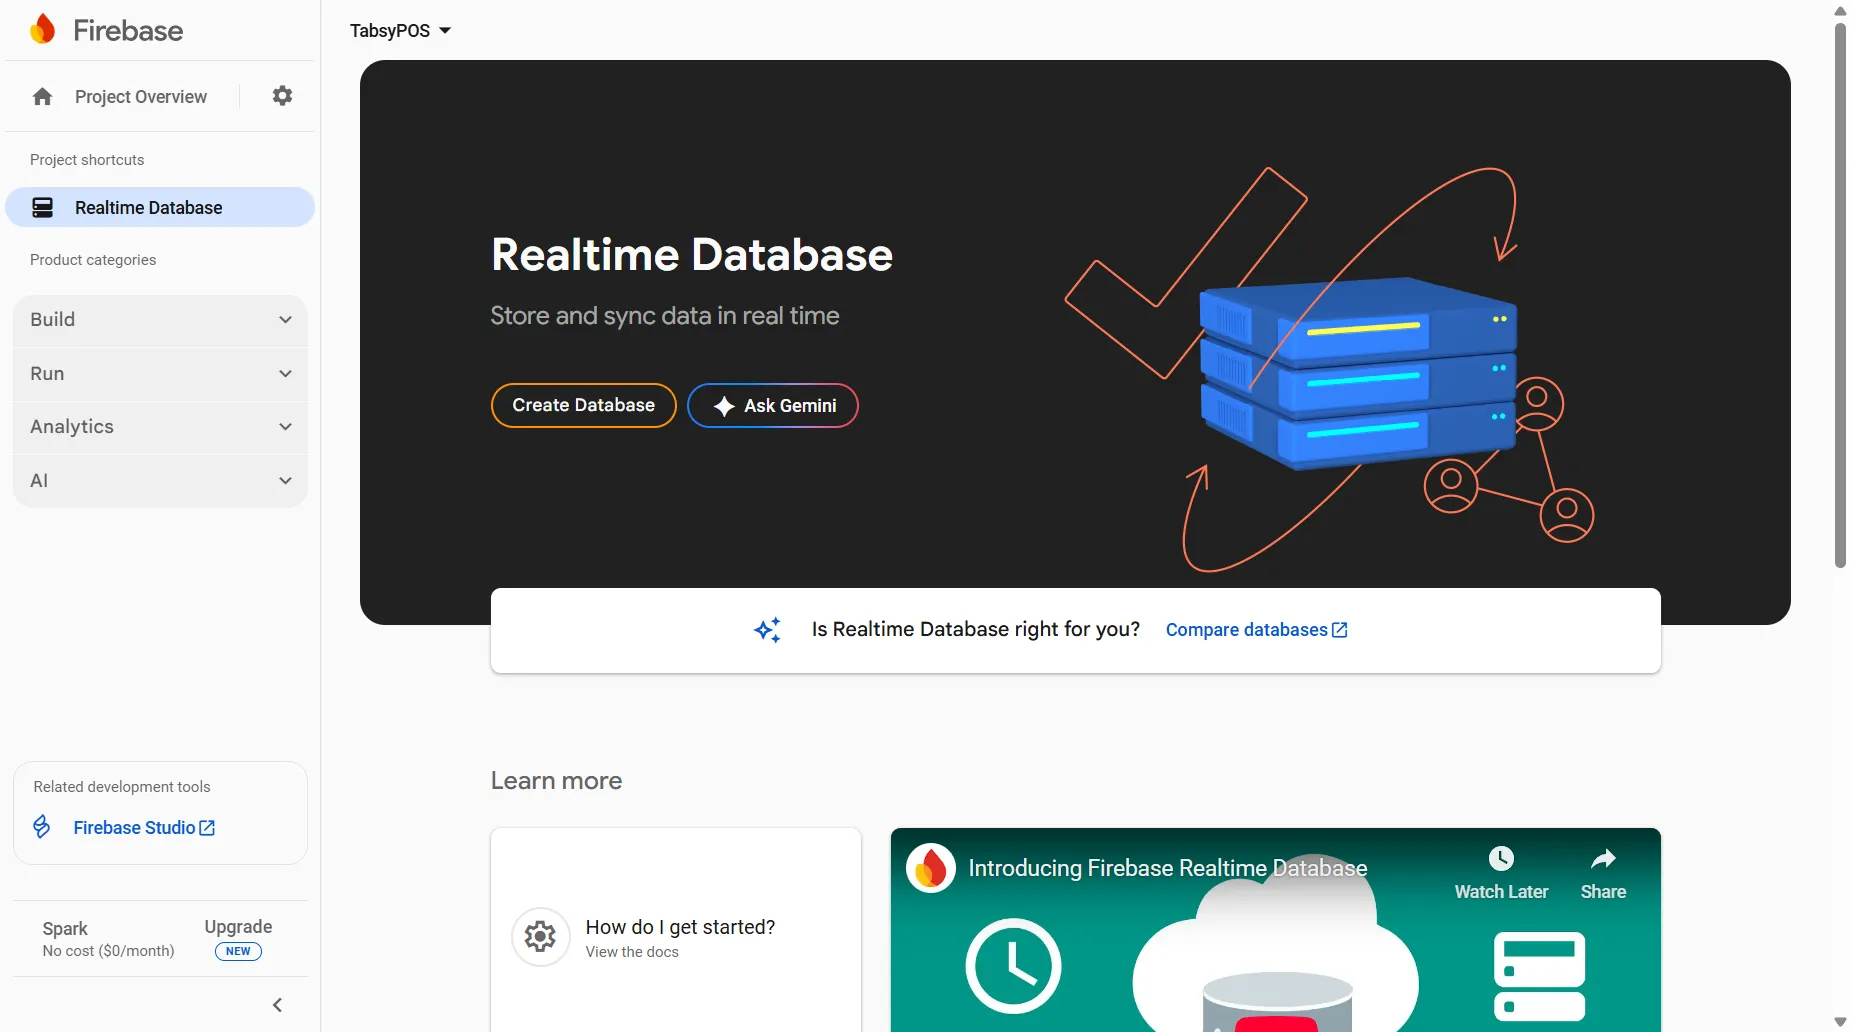
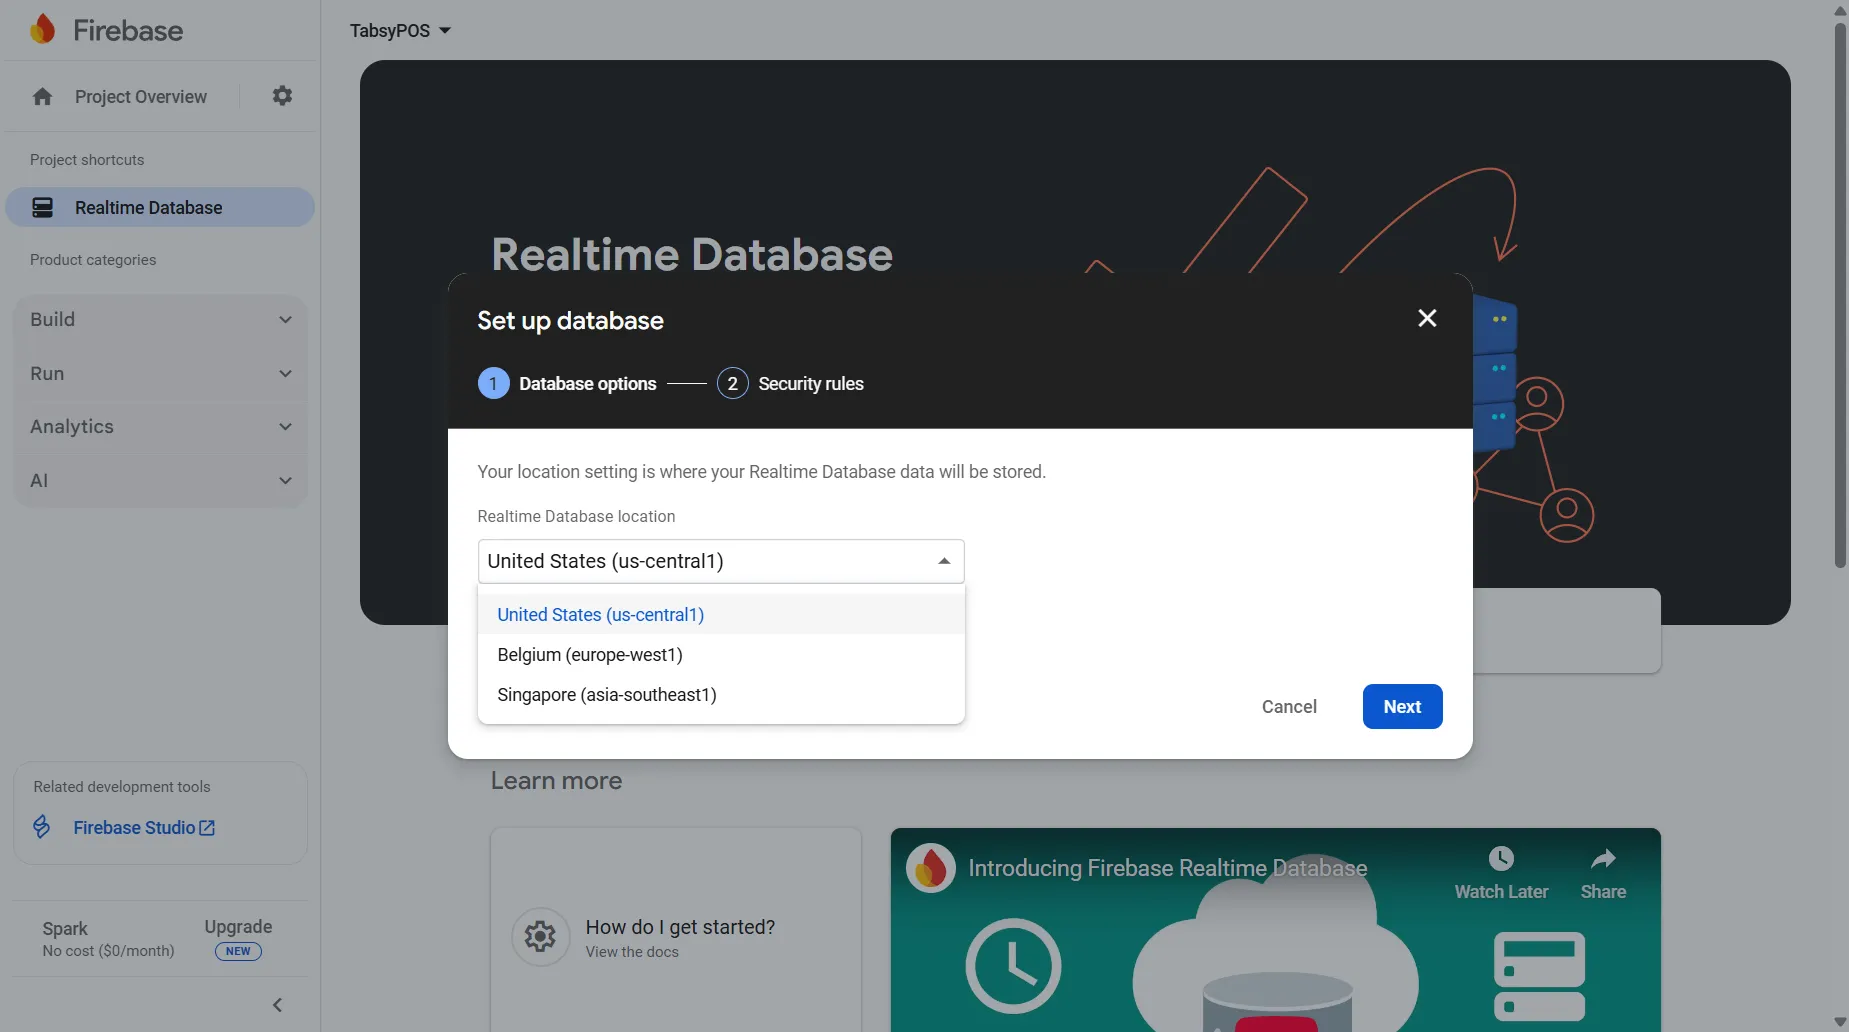
  • Go to Firebase Console → Realtime Database.

  • Click on the Data Tab

  • Expand the nodes under your project — you should see structured data such as product lists, transactions, or user data as synced from TabsyPOS.

  • Any new data or updates in TabsyPOS will reflect here automatically after syncing.

    TabsyPOS--Realtime-Database--Data--Firebase-console-11-11-2025_10_17_AM.png


Step 8: Sync Data (First-Time Setup Only)

Once all the keys are saved, click Sync All Data in TabsyPOS to synchronise your current data with Firebase.

Note: This step is required only once during the initial setup. This option will appear only if there is already data stored in Firebase.

Once the configuration is complete, you will be able to enable “Auto Sync” in TabsyPOS Firebase settings.

Once this setup is complete, TabsyPOS will automatically sync your sales, product, and customer data through Firebase — ensuring your records remain secure and up to date.

Important Notes:

To ensure a smooth and conflict-free Firebase setup and synchronisation, please keep the following points in mind:

  • Sync Data needs to be performed when Firebase configuration keys are added to a new device.
  • If you need to transfer existing data from Firebase to a new device, use the Restore Data option
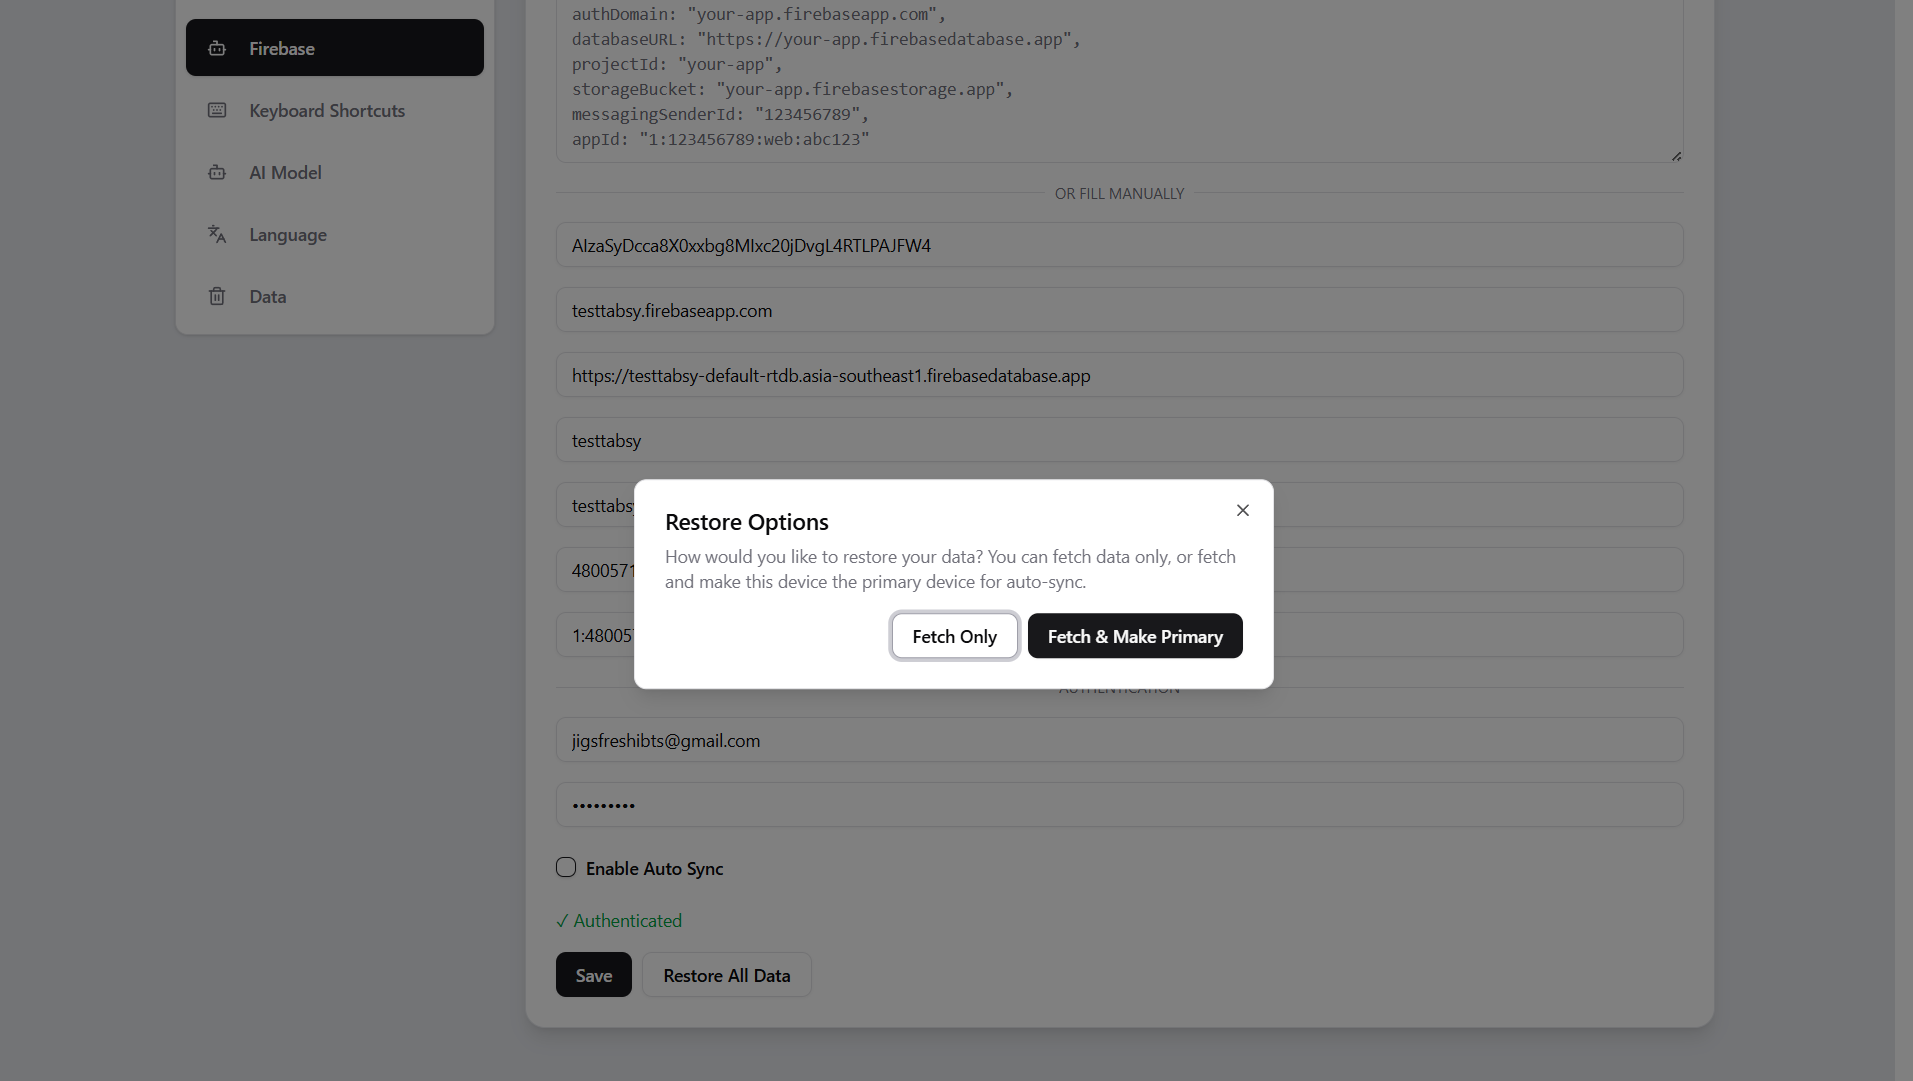
  • When performing Restore Data, you will be prompted to choose between two options:
    • Fetch Only – This option restores the data on the device without making it the primary source.

    • Fetch & Make Primary – Selecting this option restores the data and also assigns this device as the primary device.

      Screenshot_2025-12-02_102718.png

    • Once a device is set as Primary, only that device can send updates or changes back to Firebase.

  • Firebase configuration keys cannot be used on multiple devices, as this can cause data conflicts.
  • The Restore Data option is available only when the TabsyPOS database is empty.
  • Always remove the key from the first device before performing a Data Restore on another device to avoid data conflicts.